Blocks
Build a program by snapping blocks together, then run it on your hub. Every block also becomes a line of Python, so you can see real code grow as you build.
The Blocks page
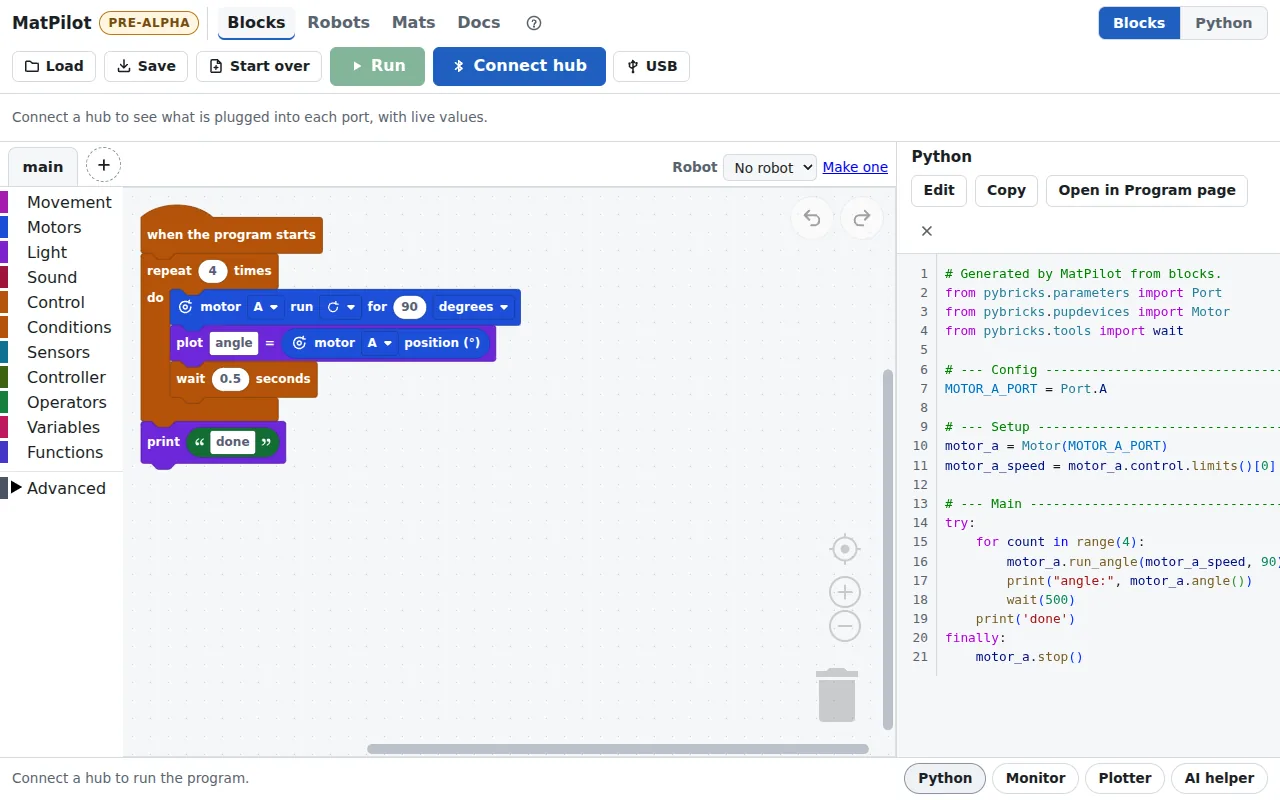
- The block categories. Tap one to see its blocks.
- “when the program starts”: put your blocks under it, in order.
- Run sends the program to the hub and starts it.
- Connect hub, over Bluetooth; USB beside it, for a cable.
- What is plugged into each port, live.
- Blocks, or Python on the whole page.
- The Python your blocks make.
- Undo and redo.
- Load, Save and Start over.
- Tabs: + adds a tab for blocks of your own.
- The robot this program drives.
- Python, Monitor, Plotter and the AI helper.
- Help: opens this page.
- Snap blocks together under “when the program starts” and press Run.
- Tap a block’s picture to choose a port, a turn, a speed or a light picture.
- Find blocks by colour on the left: Movement, Motors, Light, Sound, Control, Conditions (if, else and switch), Sensors and more.
- Python shows the code your blocks make. You can edit it too.
- Make blocks of your own in Functions, and keep them in tabs (+): each tab is a Python file that main uses.
- Undo (↶) takes back a change.
- Save and Load keep programs in a file, or in your team’s GitHub repository.
- Stop ends the program, and every motor stops with it. Leaving the page or disconnecting stops it too. If the Bluetooth connection drops, the program keeps running on the hub: press the hub’s centre button to stop it.
- The bar above the blocks shows what is plugged into each port while no program runs.
Pictures on blocks
Many blocks have a picture you can tap. It opens a bigger picture to choose from: no numbers to remember.
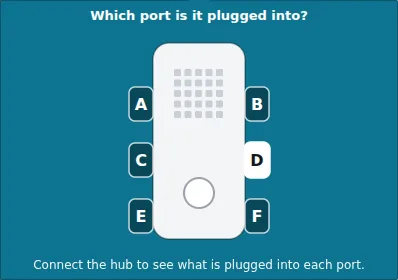
Ports: tap where the motor or sensor is plugged in. With a hub connected, each port says what it sees.
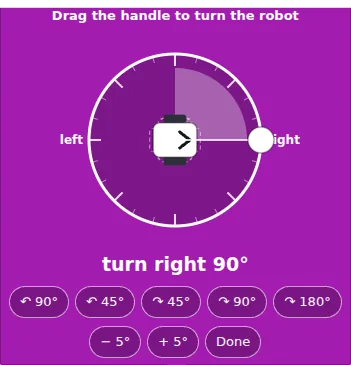
Turns: drag the robot on the dial to where it should face.
Conditions: if, else and switch
The Conditions category has the blocks that decide. Each question block (the six-sided ones) is true or false: “colour sensor sees red”, “distance sensor is closer than 100 mm”, “touch sensor is pressed”.
- if does the blocks inside only when the question is true.
- if … else does one thing or the other.
- else if asks another question when the first one was false.
- switch on checks one thing once, such as the colour the sensor sees, then does the case that matches, or “otherwise”. Press ⊕ for another case and ⊖ to remove the last one.
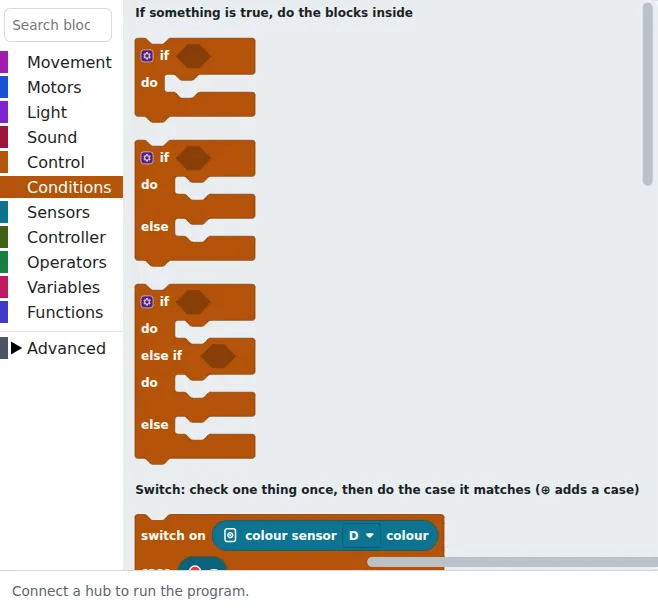
The Conditions category.
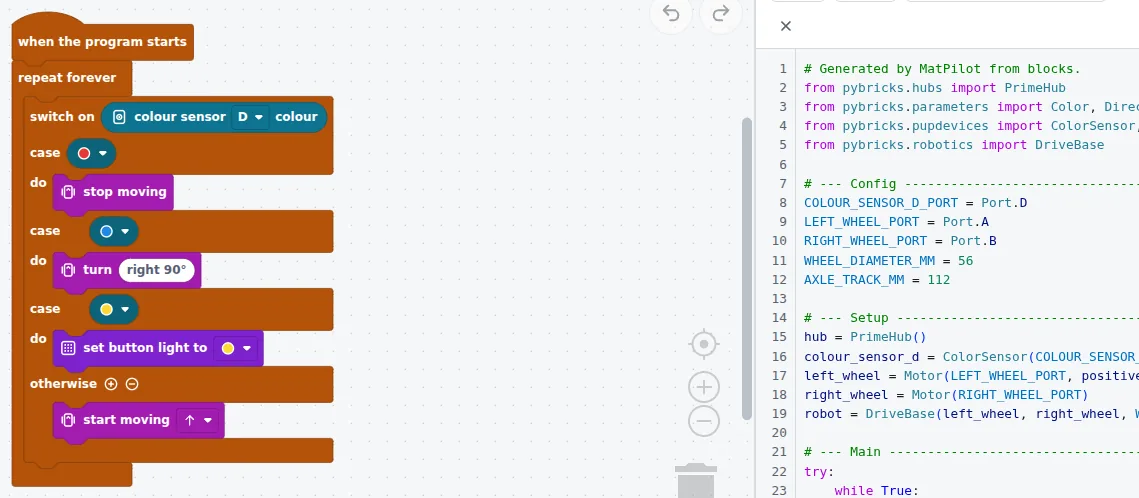
A switch on the colour sensor, and the Python it makes: an if … elif … else.
- ⊕ adds a case; ⊖ removes the last one.
- The colour is read once, into switch_value.
Put a switch inside repeat forever so the robot keeps checking.
Python
Press Python to see the code your blocks make. It changes as you move blocks. Press Edit to change the Python itself: when you press Update blocks, MatPilot turns it back into blocks, and marks any line it cannot turn into a block.
Blocks of your own, in tabs
In Functions, a “define” block makes a block of your own, such as “square” that drives a square. Give it inputs with ⊕, like the length of a side. Keep such blocks in their own tab (the + beside “main”): each tab becomes a Python file that main uses, so long programs stay tidy.
Which robot
Choose your robot above the blocks (Robot), and the movement blocks use its wheels and ports. Make the robot first on the Robots page.
Stopping safely
Stop ends the program and every motor stops with it. If the Bluetooth connection drops while a program runs, the program keeps going on the hub: press the hub’s centre button to stop it.