Robots
Tell MatPilot about your robot once: how big it is, its wheels, and which ports its motors and sensors use. Then the movement blocks drive the right distances, and the robot can try programs on a mat.
The Robots page
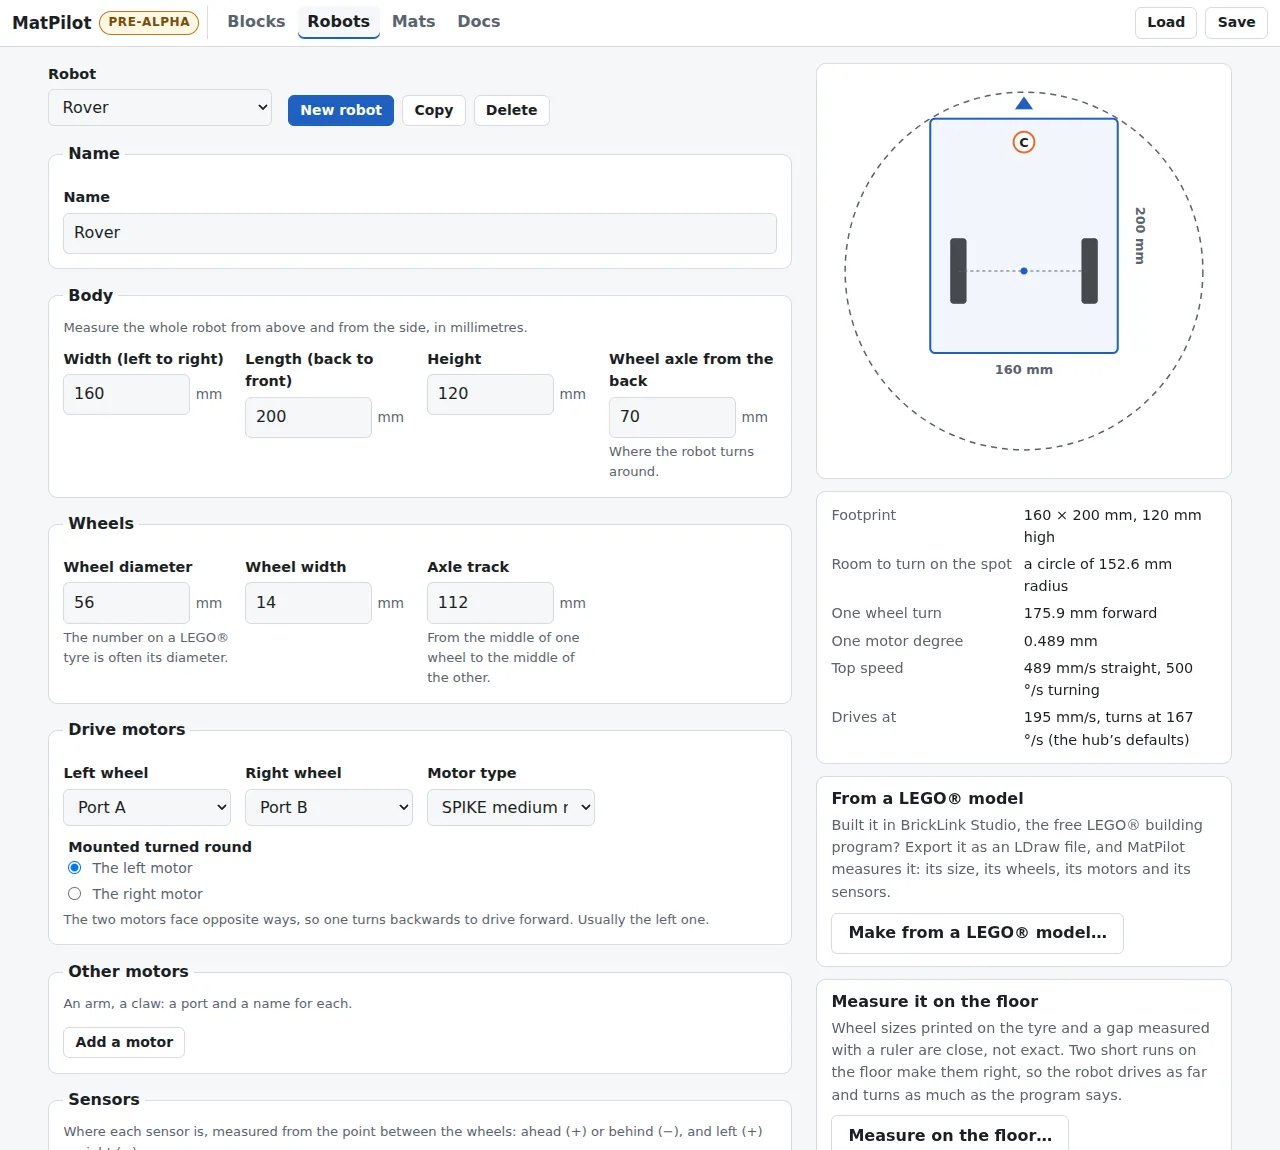
- Your robots. New makes another one.
- Its name, size and wheels, in millimetres.
- The robot drawn to scale, seen from above.
- Make it from a LEGO® model (below).
- Measure it on the floor with the hub.
- Save it as a file, or on your team’s GitHub.
Measure it with a ruler
- Wheel size: the first number printed on the tyre, such as 56 for the SPIKE Prime wheel (56 mm across).
- Track: from the middle of one wheel to the middle of the other.
- Ports: which port each motor and sensor is plugged into. Say which wheel motor is on the left.
A ruler is close, not exact. Measure on the floor runs two short moves with your hub and corrects the wheel size and the track, so the robot drives as far and turns as much as the program says.
Make it from a LEGO® model
Built your robot in BrickLink Studio, the LEGO Group’s free building program? MatPilot can measure the model for you.
- In Studio, choose File → Export As and save it as LDraw (.ldr or .mpd) (Studio’s help). Studio’s own .io file does not work: export it first.
- On the Robots page, press Make from a LEGO® model… and choose the file.
- MatPilot finds the hub, the wheels, the motors and the sensors, and shows the model in 3D. Drag it to turn it. Check the arrow points to the front; if not, press Turn the front round.
- Give each motor and sensor the port it is plugged into on the real robot.
- Press Use these numbers. The robot keeps the model, so you can open it again later.
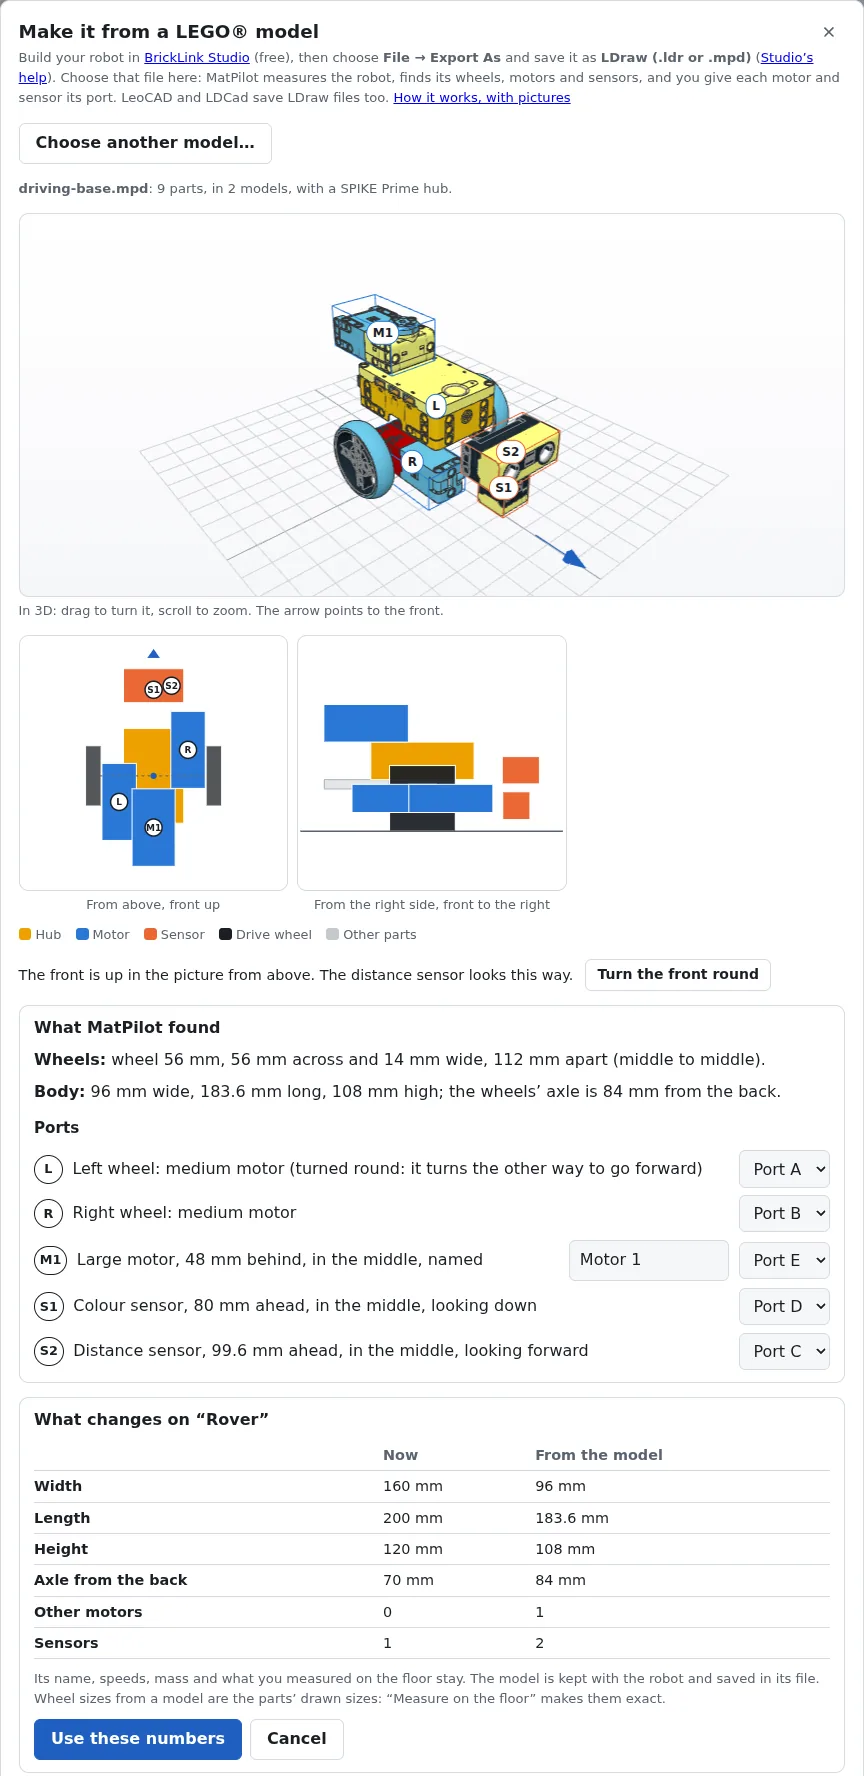
- Choose the LDraw file you exported from Studio.
- The model in 3D: drag to turn it, scroll to zoom.
- Where MatPilot thinks the front is, and why.
- The ports: one for each motor and sensor it found.
- Use these numbers for your robot.
The shapes and sizes of the parts come from the LDraw Parts Library, made by volunteers. See the Credits.