Mats
Put your competition mat on the screen at its real size. Place your robot on it, measure, draw a path, and try a program on the mat before you try it on the table.
Add a mat
- Open Mats and press Add a mat.
- Choose the mat’s PDF, the printing file a competition gives out: MatPilot reads its real size from it. A photo or a picture works too; then you type its size.
- Choose the competition’s rules, if there are any, to check your robot’s size.
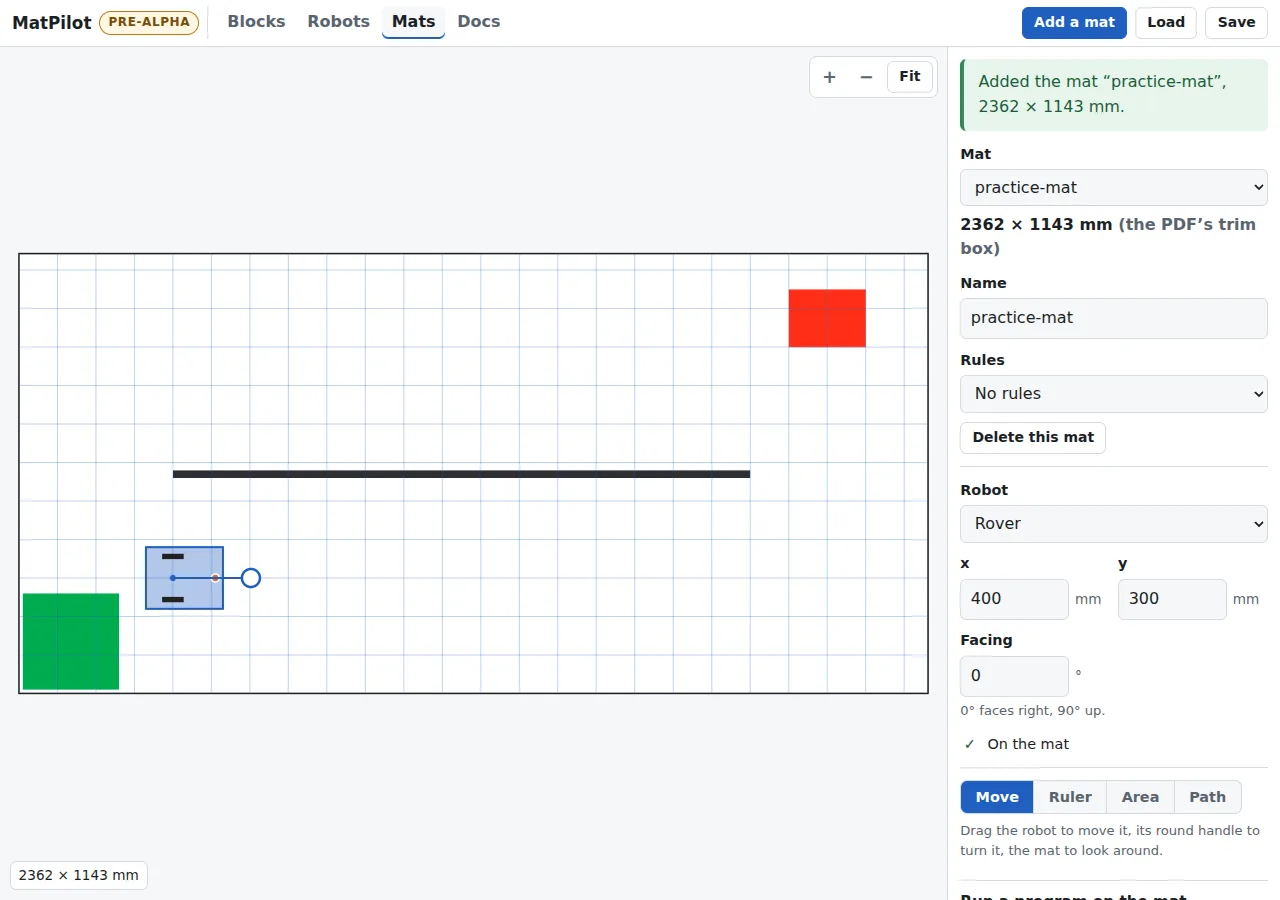
- Add a mat, and Load or Save one.
- Your robot on the mat: drag it, or turn it by its handle.
- Or type where it stands and which way it faces.
- Move, Ruler, Area and Path.
The tools
- Move: drag the robot, or the mat to look around.
- Ruler: measure from one point to another, in millimetres.
- Area: mark the start area and the targets.
- Path: tap where the robot should go. MatPilot works out the turns and moves, and can add them to your program on the Blocks page.
Try a program on the mat
Under Run a program on the mat, choose the program from the Blocks page and press Run. MatPilot runs it on the screen, without a hub: the robot drives, its colour sensor reads the mat, and you can play it back, faster or slower.
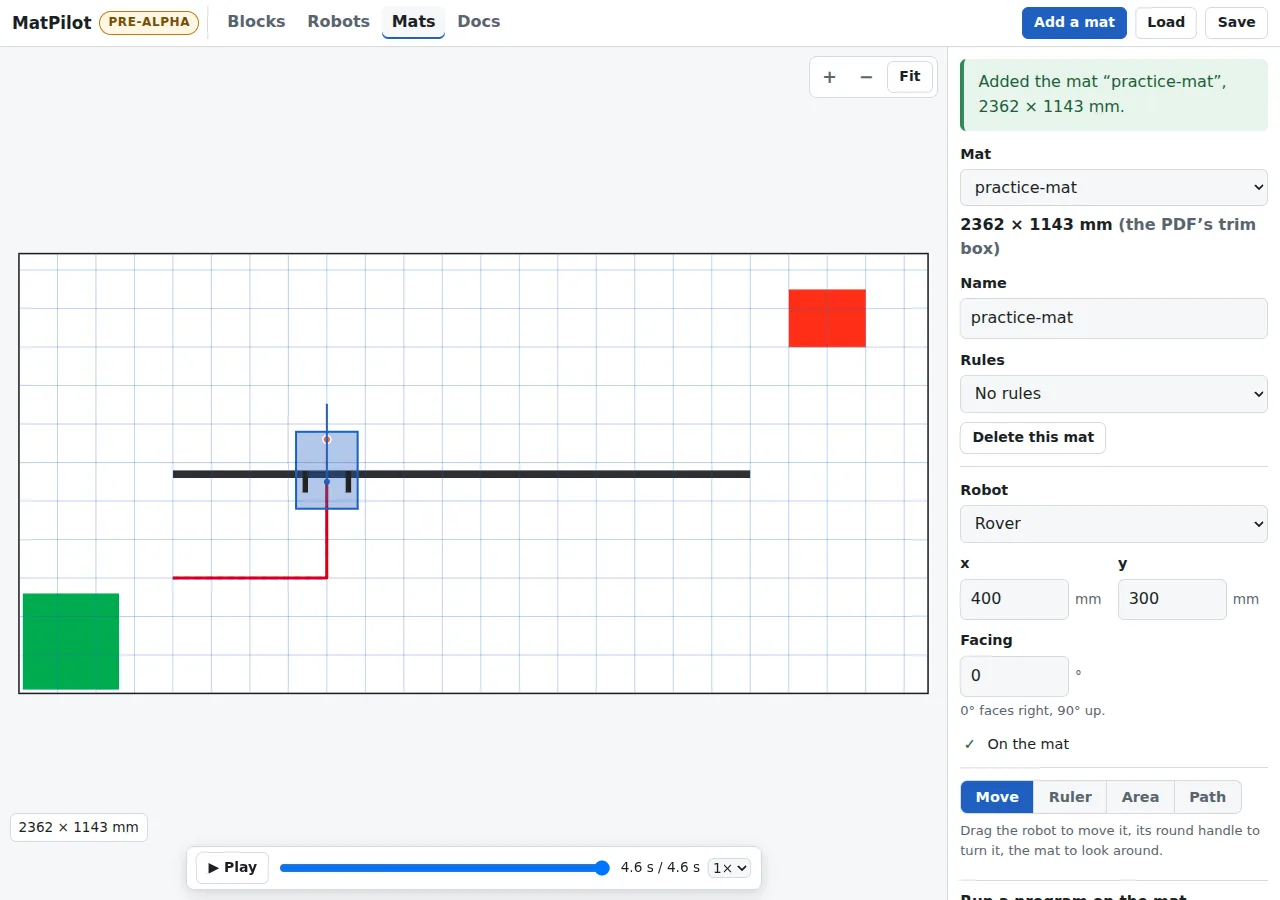
- The path the robot drove.
- Play it back, or drag to any moment.
How sure is it? A real robot never drives exactly the same twice. Once your robot is measured on the floor, MatPilot shows where it may really end, from many pretend runs.